

Removing a load bearing wall: What our choices were

In a current project, I had some options to remove a load bearing wall. What were my choices and what did I end up doing?
My Love At First Sight project has been rolling right along. For this project, I had planned to take out two walls on the main floor to open up

What I had to work with
When I first viewed this property, both online and in person, I instantly fell in love with it. Pride of ownership is something that you can spot a mile away). You know when you enter a home and it has a 'feel'. This home gave me the feels!
I instantly fell in love with the home! I have often said to the Mr. that we should keep it when we're all done, that is how much I love this home!

Option 1 - Use 2 posts to replace the load bearing wall
Once we got possession, I had my engineer in to analyze the situation and make is recommendations. His recommendation, due to budget, was to use 2 posts in order to remove the load bearing wall. In my original plan, I had full intentions of using two posts. I had intentions of incorporating the posts into the island, and bada-bing, bada-boom, all would be good.
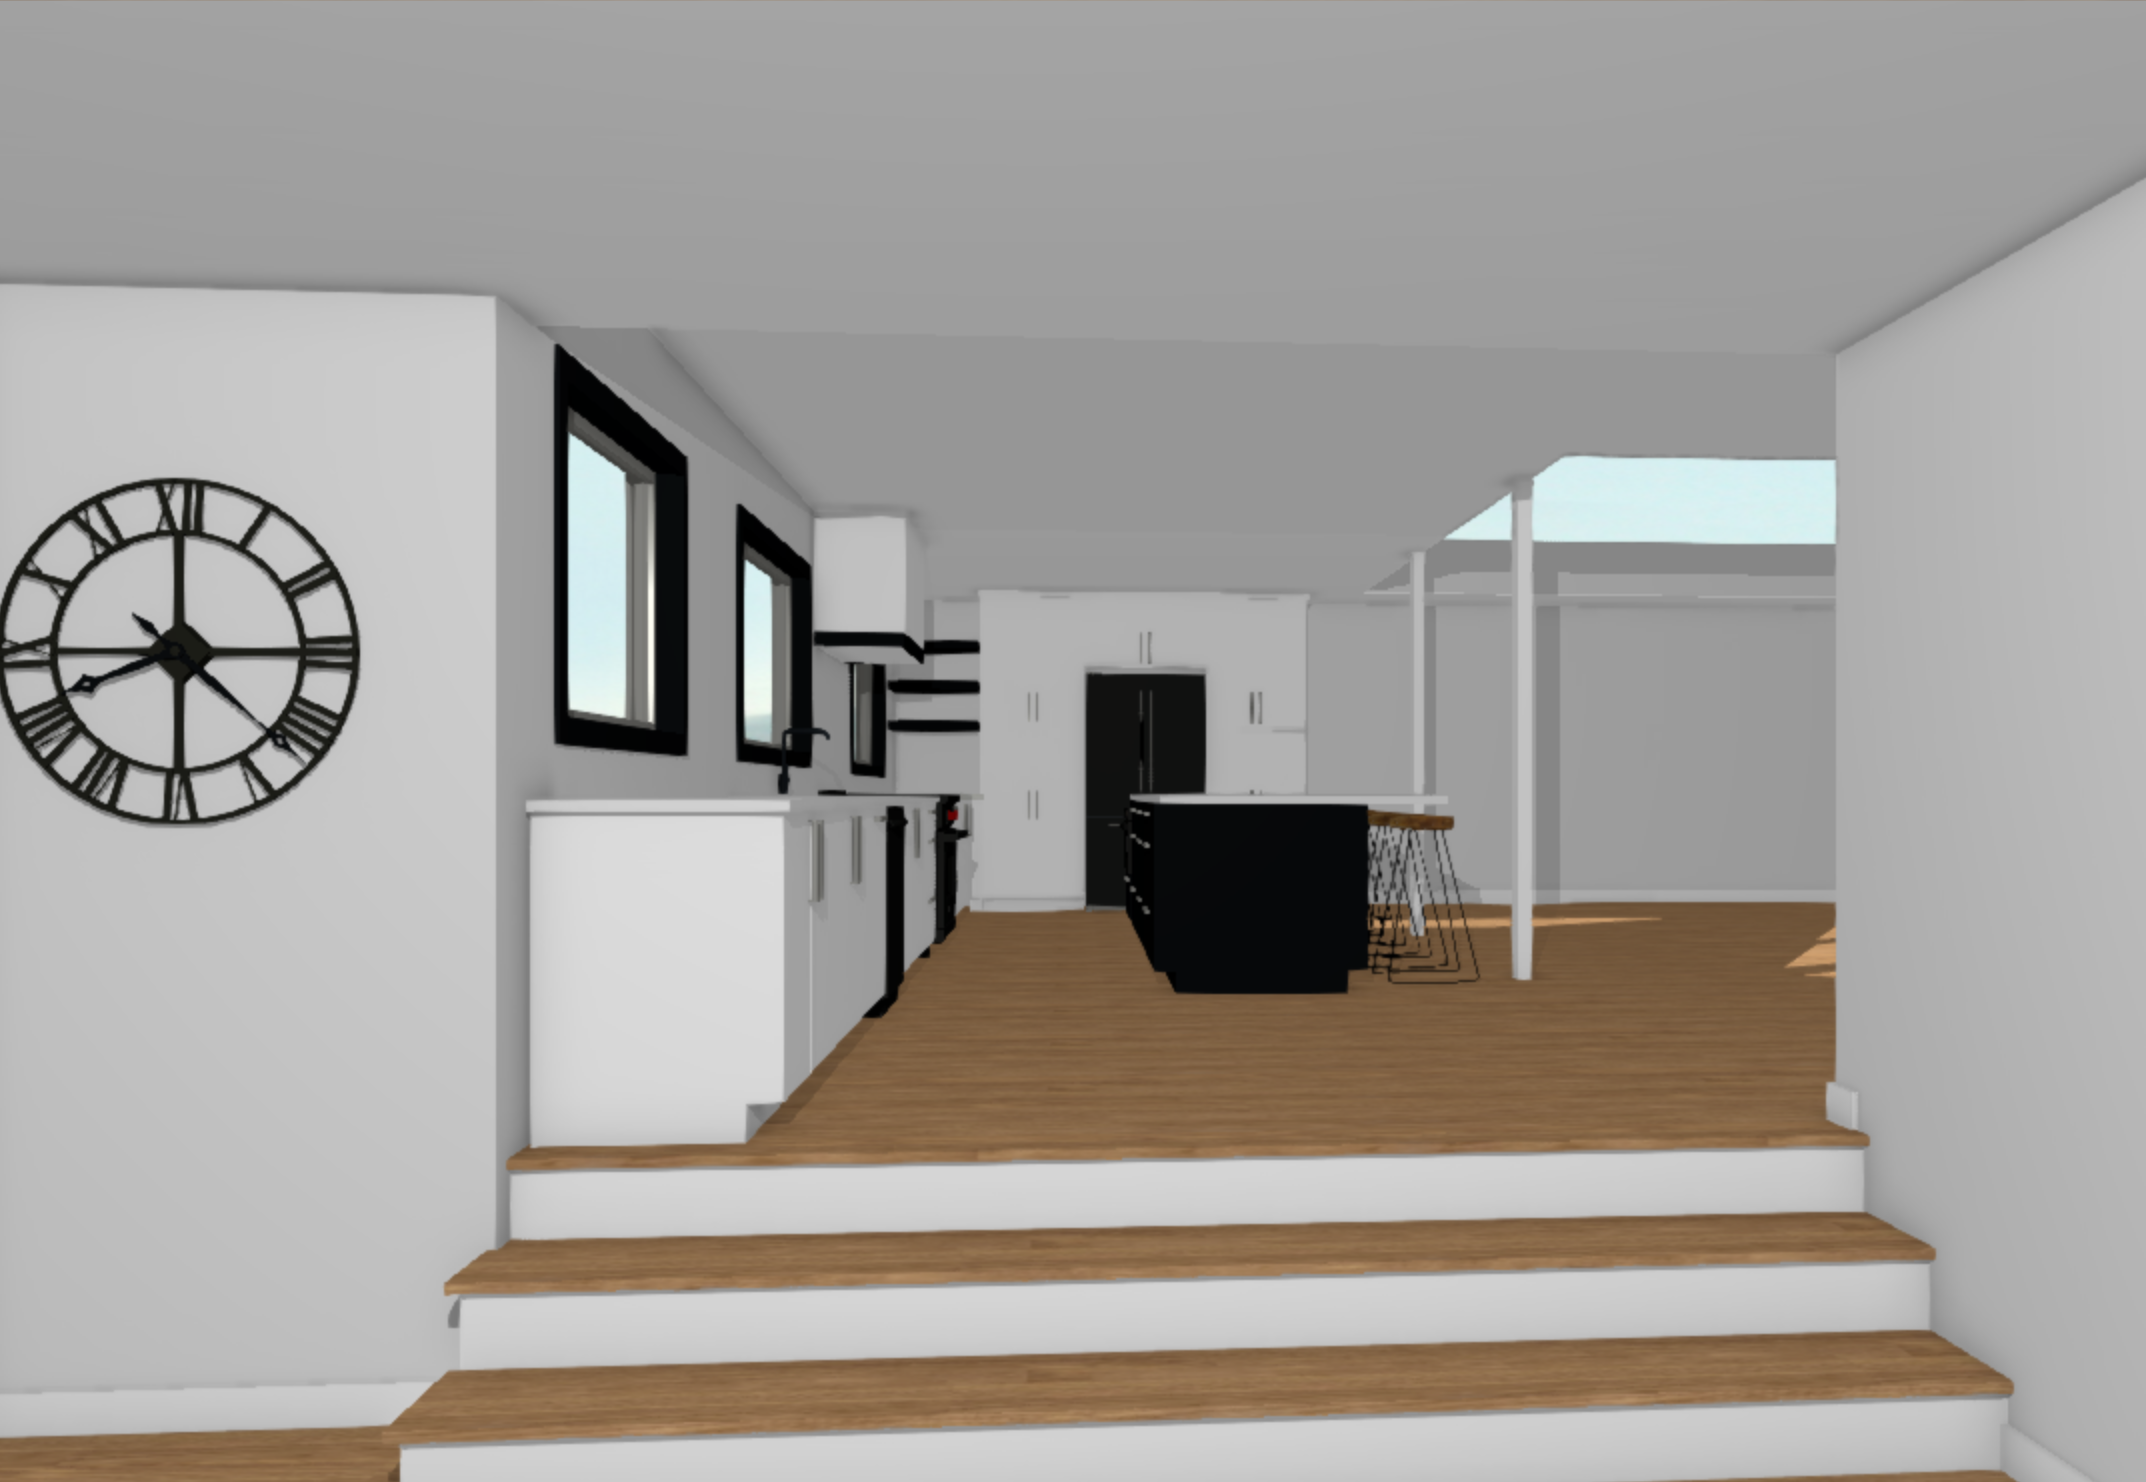
The conceptual rending below gives you an idea of incorporating the posts into the island.

What really happened?
The engineer visited the home and made his recommendations. When
Oh shit!
The posts were too far to incorporate into the island. Here is what the plan was looking like.
You saw the words I used above right? This was going to be a no-go. On to Plan B.
Plan B: use the two posts and create a larger island
With the posts having to sit on a particular 'line', I looked at making the island larger. While I could have made the island larger (as in the conceptual design below), the island was becoming a monstrosity! Just imagine all of the cabinets and stone I was going to need - just for the island!

Option 2 - Remove the posts and use a beam
It was clear that the posts were not going to wor
Hurdle 1 - The Scope of Work
It is very hard to get a price on work when you're not sure what is needed to be done.
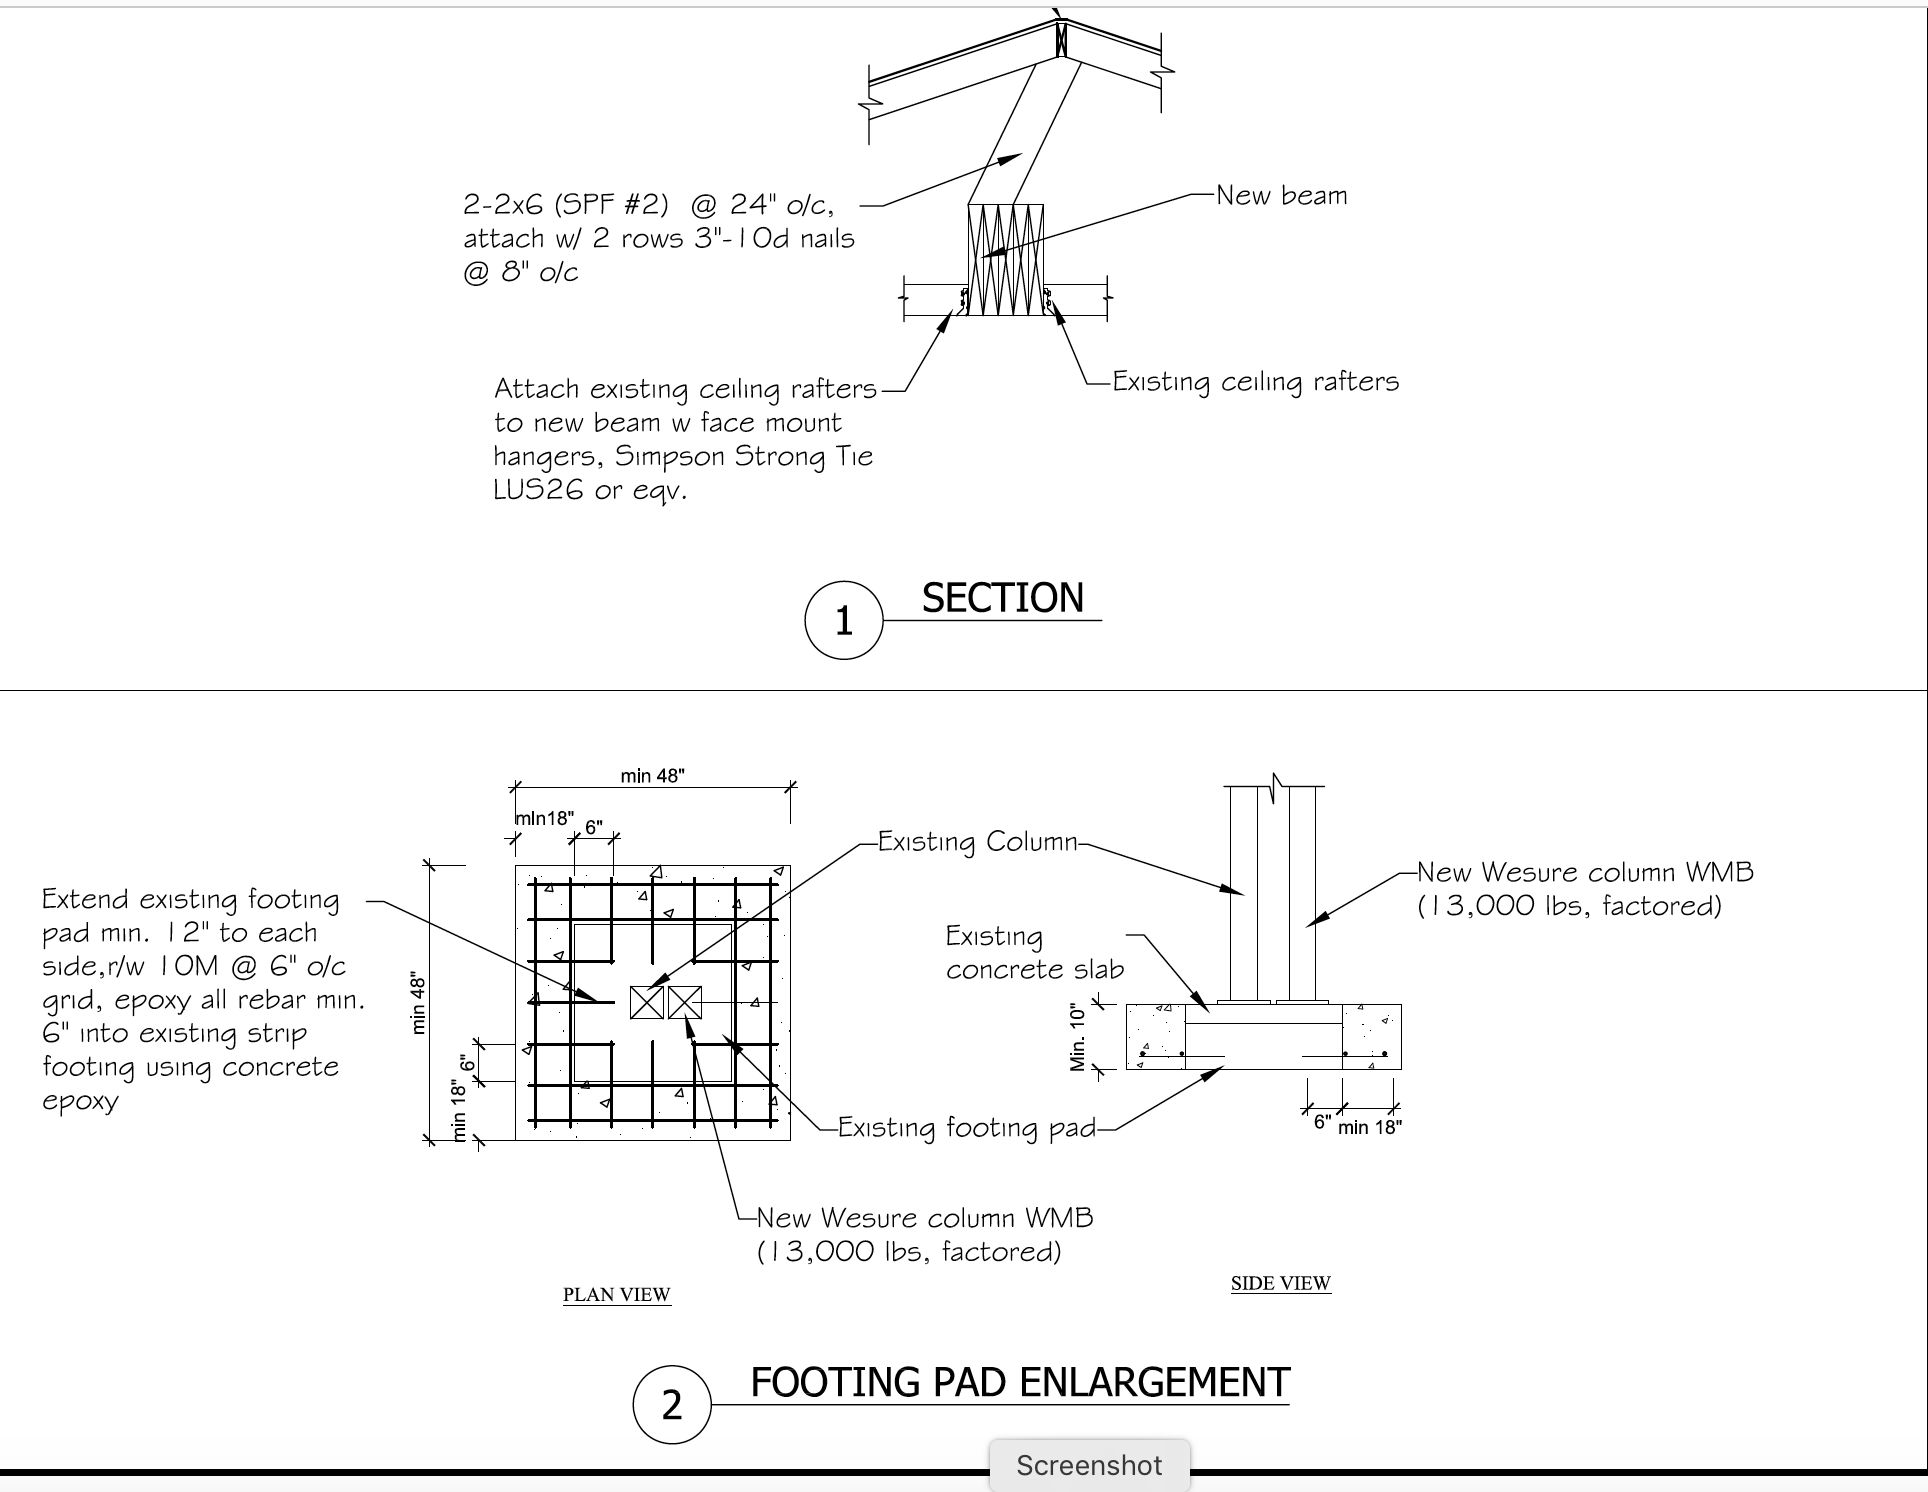
My GC and I had the engineer back to the house to give us a full write-up as to what was needed. With the directions laid out by the engineer, I was able to clearly see the scope of the work.
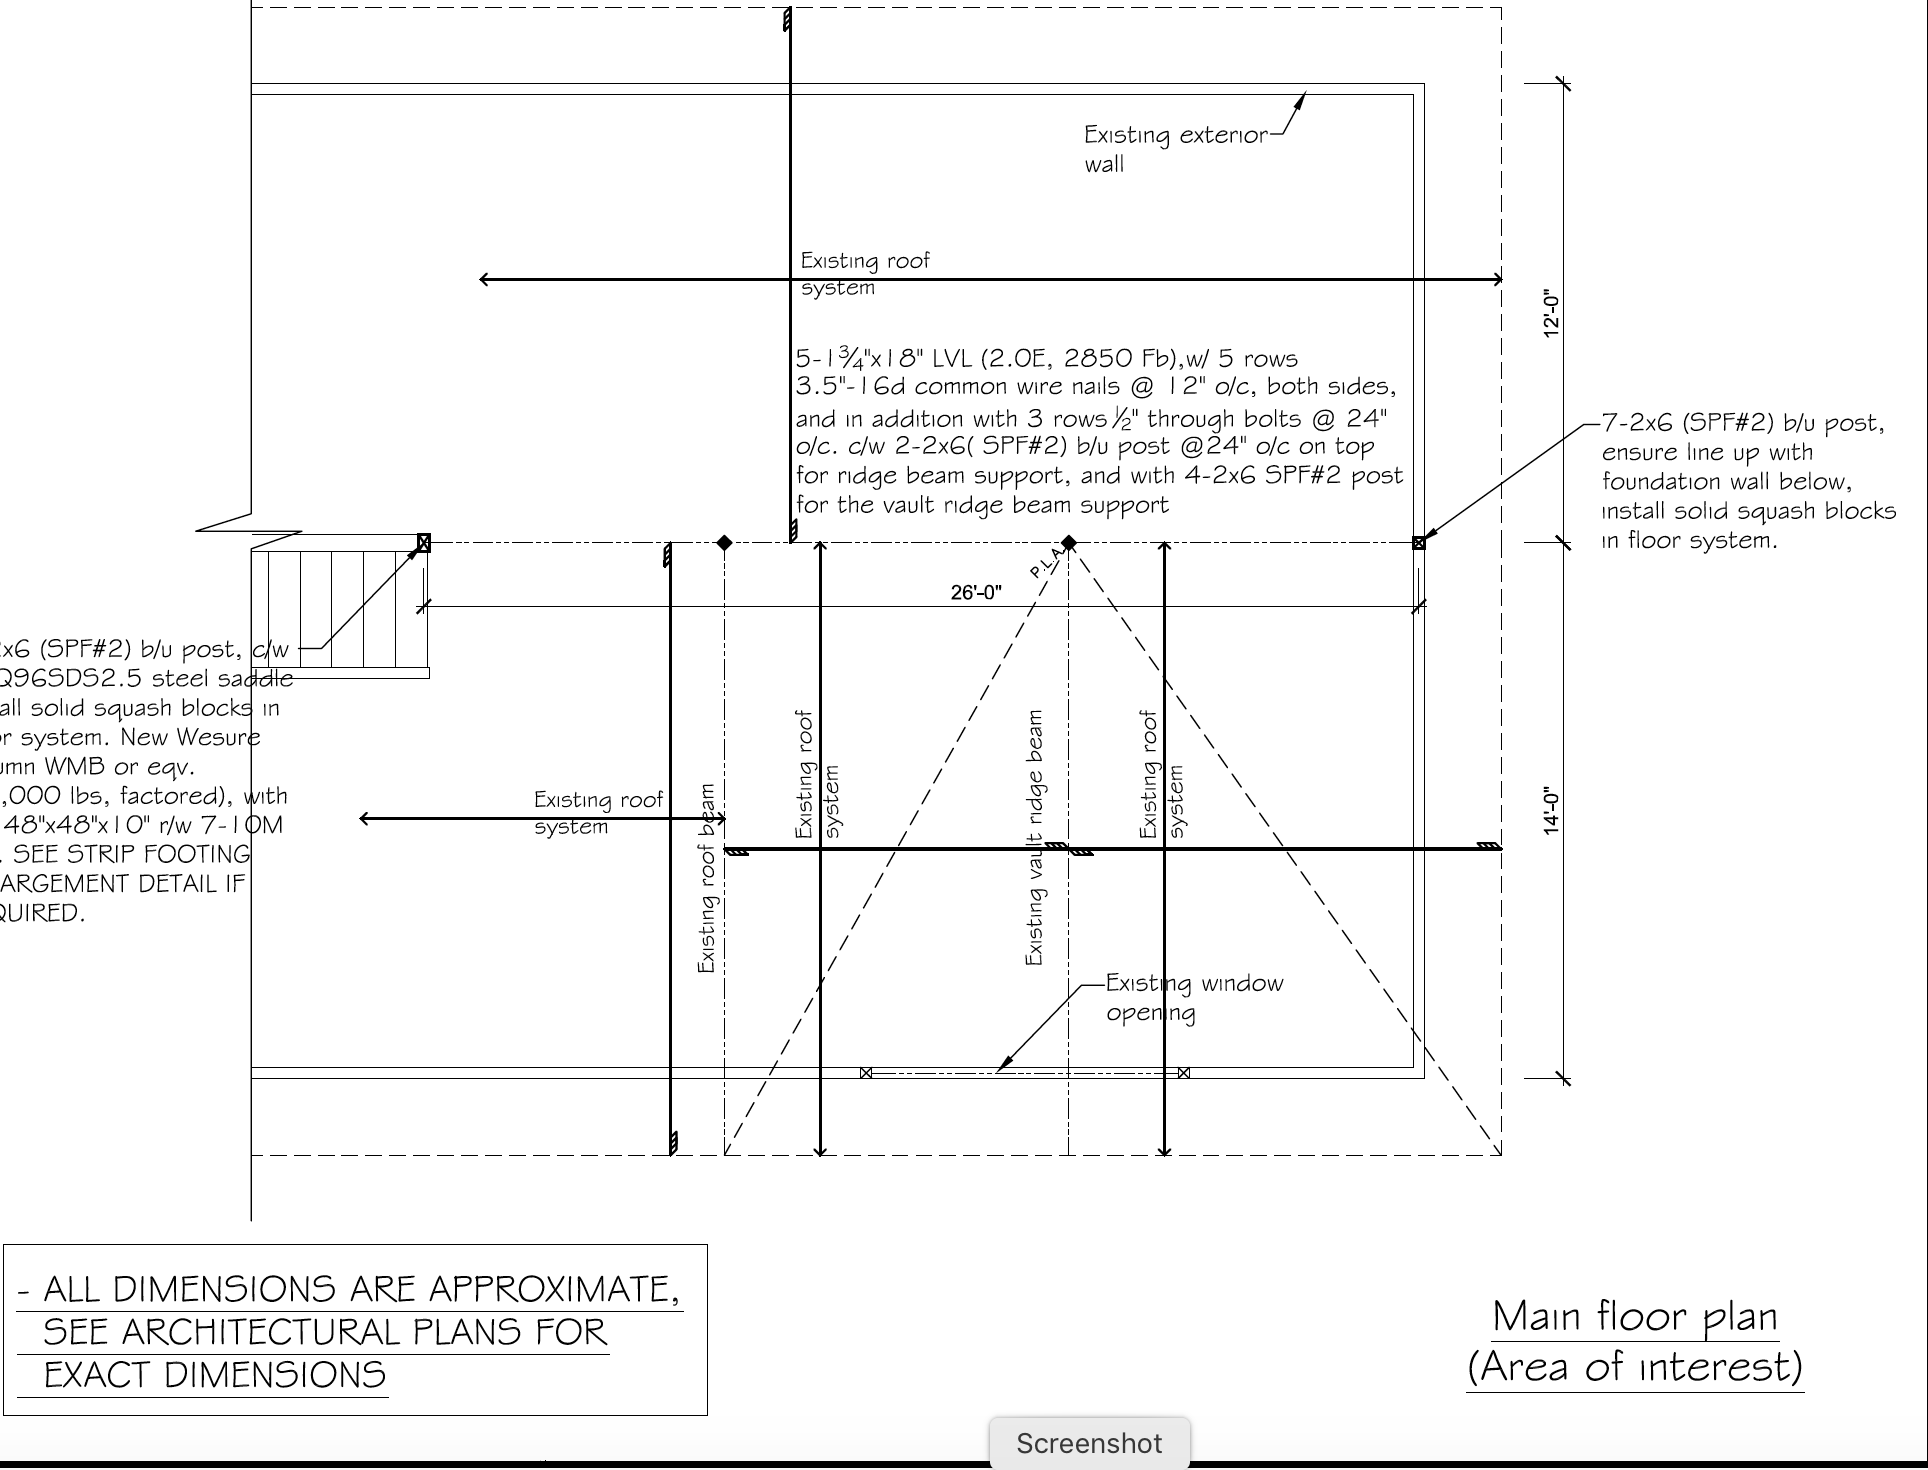
Below is what we required to be done in the basement.
Hurdle 2 - Cost of doing the work
How much?
I ask that question often. With the scope of work finalized, I needed a number to go along with the work. With all of the work, I was looking at a rough budget of $3500 - $5000 more dollars to install the beam.
Making the Call
When I have to make choices for an investment property, I am making the call. I reviewed the options with my real estate agent, the Mr., and my GC. It was a no-brainer to remove the load bearing wall and the two posts! It was full steam ahead to fully open up this space!
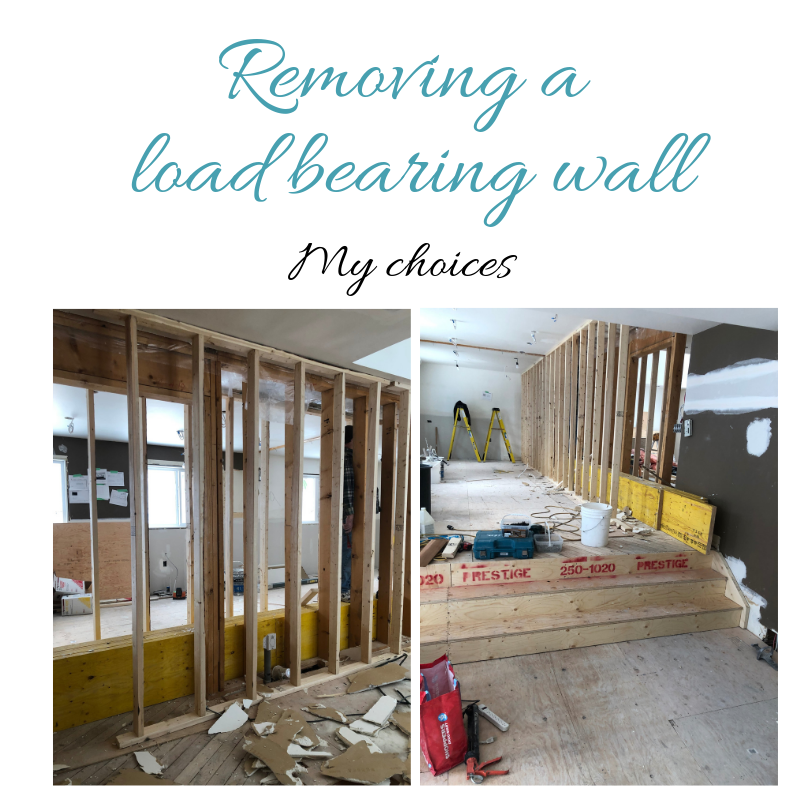
Removing the Load Bearing Wall
While we did not need to increase our footing, we did need to install a new post.
The second part was to install two temporary walls and prepare for the beam. Below is the 26' beam (5 ply).


Taking this $3500 - $5000* hit to the budget is not one that I took lightly. I looked at all of my options, weighed the pros and cons, and made the decision to install this beam. Let me tell you, there were a few
*The final invoice has not been submitted as I wrote this however I know that it will not be exceeding $5000.00.
As I often say to my residential clients, we are one day closer. Although it looks like we have a lot of work to still complete, we truly are one day closer!

Looking to invest in real estate and don't know where to start? Contact me today!