

ONE ROOM CHALLENGE™ WEEK 3: THE KEY FEATURES oF THE DESIGN
We are into Week 3 of the One Room Challenge™ and so far, so good. Demo is complete along with the rough -in plumbing and rough-in electrical. The dirty and messy work of drywall has begun. Wish me luck!
If you are a new reader, you can read our previous posts here:
If you are new to what the One Room Challenge™ is, it is an event for the design community. The ORC™ is currently in its thirteenth season, and this challenge is a widely anticipated biannual event every April and October. Every Wednesday, the designers document their process while sharing their sources and professional advice over the eight weekly posts. You can see all of the participants here.

This spring, Apartment Therapy is the official media sponsor as well!
KEY FEATURES of the design
There are many things I disliked about our existing ensuite so a new design was created. Within that design, there are many moving parts to address. While it’s easy to say there will be plumbing and electrical changes, it is important that each trade knows what I am expecting (I call it their marching orders). As we do with every one of our projects, below is the scope of work for each of our trades that showcases the work to be completed.
DEMO
Prep floors and other areas upstairs.
Please keep existing shower head and arm (to be given to a friend)
Demo and remove the following from the bathroom.
Wire shelving in the closet.
Vanity, sink, faucet, mirror and lighting.
Bathtub and bath faucet.
Shower base, glass walls, and all tiles.
Wall between the closet and the bathroom.
Vanity wall between the bedroom and the bathroom.
**Remove tile on both fireplaces please. ** (Additional work done in the house)
**Please fix hand rail going up to the bonus room** (Additional work done in the house)
Framing | Drywall
Increasing the interior size of the bathroom by framing a new wall as per the design plan.
An addition of a door to this area utilizing barn door hardware. Please ensure there is backing for this hardware in the wall prior to drywalling.
Build/Frame a pony wall between the shower and the toilet area at 42” in height.
Frame of a custom size niche for the shower with finished measurements to be 36” W X 18” H.
Move current attic access to a new location marked out on the ceiling.
Scrape popcorn and finish to flat ceilings.
Drywall repair/install after rough in electrical and plumbing.
Electrical
Bedroom
1) Remove one ceiling fan while renovation is occurring, including re-installation of the
ceiling fan at final.
2) Supply and install one new fan control switch.
Ensuite
1) One Panasonic Whisper Quiet bathroom fan, complete with removal of existing and
installation of new, hookup to existing ducting (by others) to be controlled by one bath
fan timer switch.
2) One vanity light outlet complete with installation of customer supplied fixture at final,
and to be controlled by one dimmer switch.
3) One light outlet complete with installation of customer supplied fixture at final, and to
be controlled with the vanity switch.
4) One 4” LED pot light complete with white trim and to be controlled by one switch.
5) One 15amp bidet separate circuit complete with installation of GFCI and AFCI circuit
protection.
6) Supply and install electrical for one retrofit 15amp 120 or 240V separate circuit for the
bathroom floor heat. Includes a new back box, conduit to floor and pull string, complete
with the installation of one client supplied thermostat.
Plumbing
Vanity
- plumbing for 2 sinks and faucets.
Tub
- rough in for new stand alone bath with deck mount faucet
Shower
- rough in for rain shower head coming from the ceiling.
- rough in for hand held shower as per markings on site.
- rough in shower valve
Cabinetry
Install custom vanity as per the design plan. Colour and door style TBD.
Custom closets as per the design plan. Colour an door style TBD.
COUNTERS
Install new counter tops as per the design plan.
Install shower curb and pony wall cap.
Install 2 fireplaces with material that was selected in the shop.
Tile Work
All prep work for shower and floor.
Install Ditra-Heat membrane and run cables to digital thermostat.
Install 24”X24” floor tile as per the design plan.
Install custom shower base with custom curb.
Install feature shower wall (12” X 40”) as per the design plan.
GLASS SHOWER WALLS
Install new shower walls as per the design plan.
WALLPAPER
Install wallpaper on 3 walls as per the design plan.
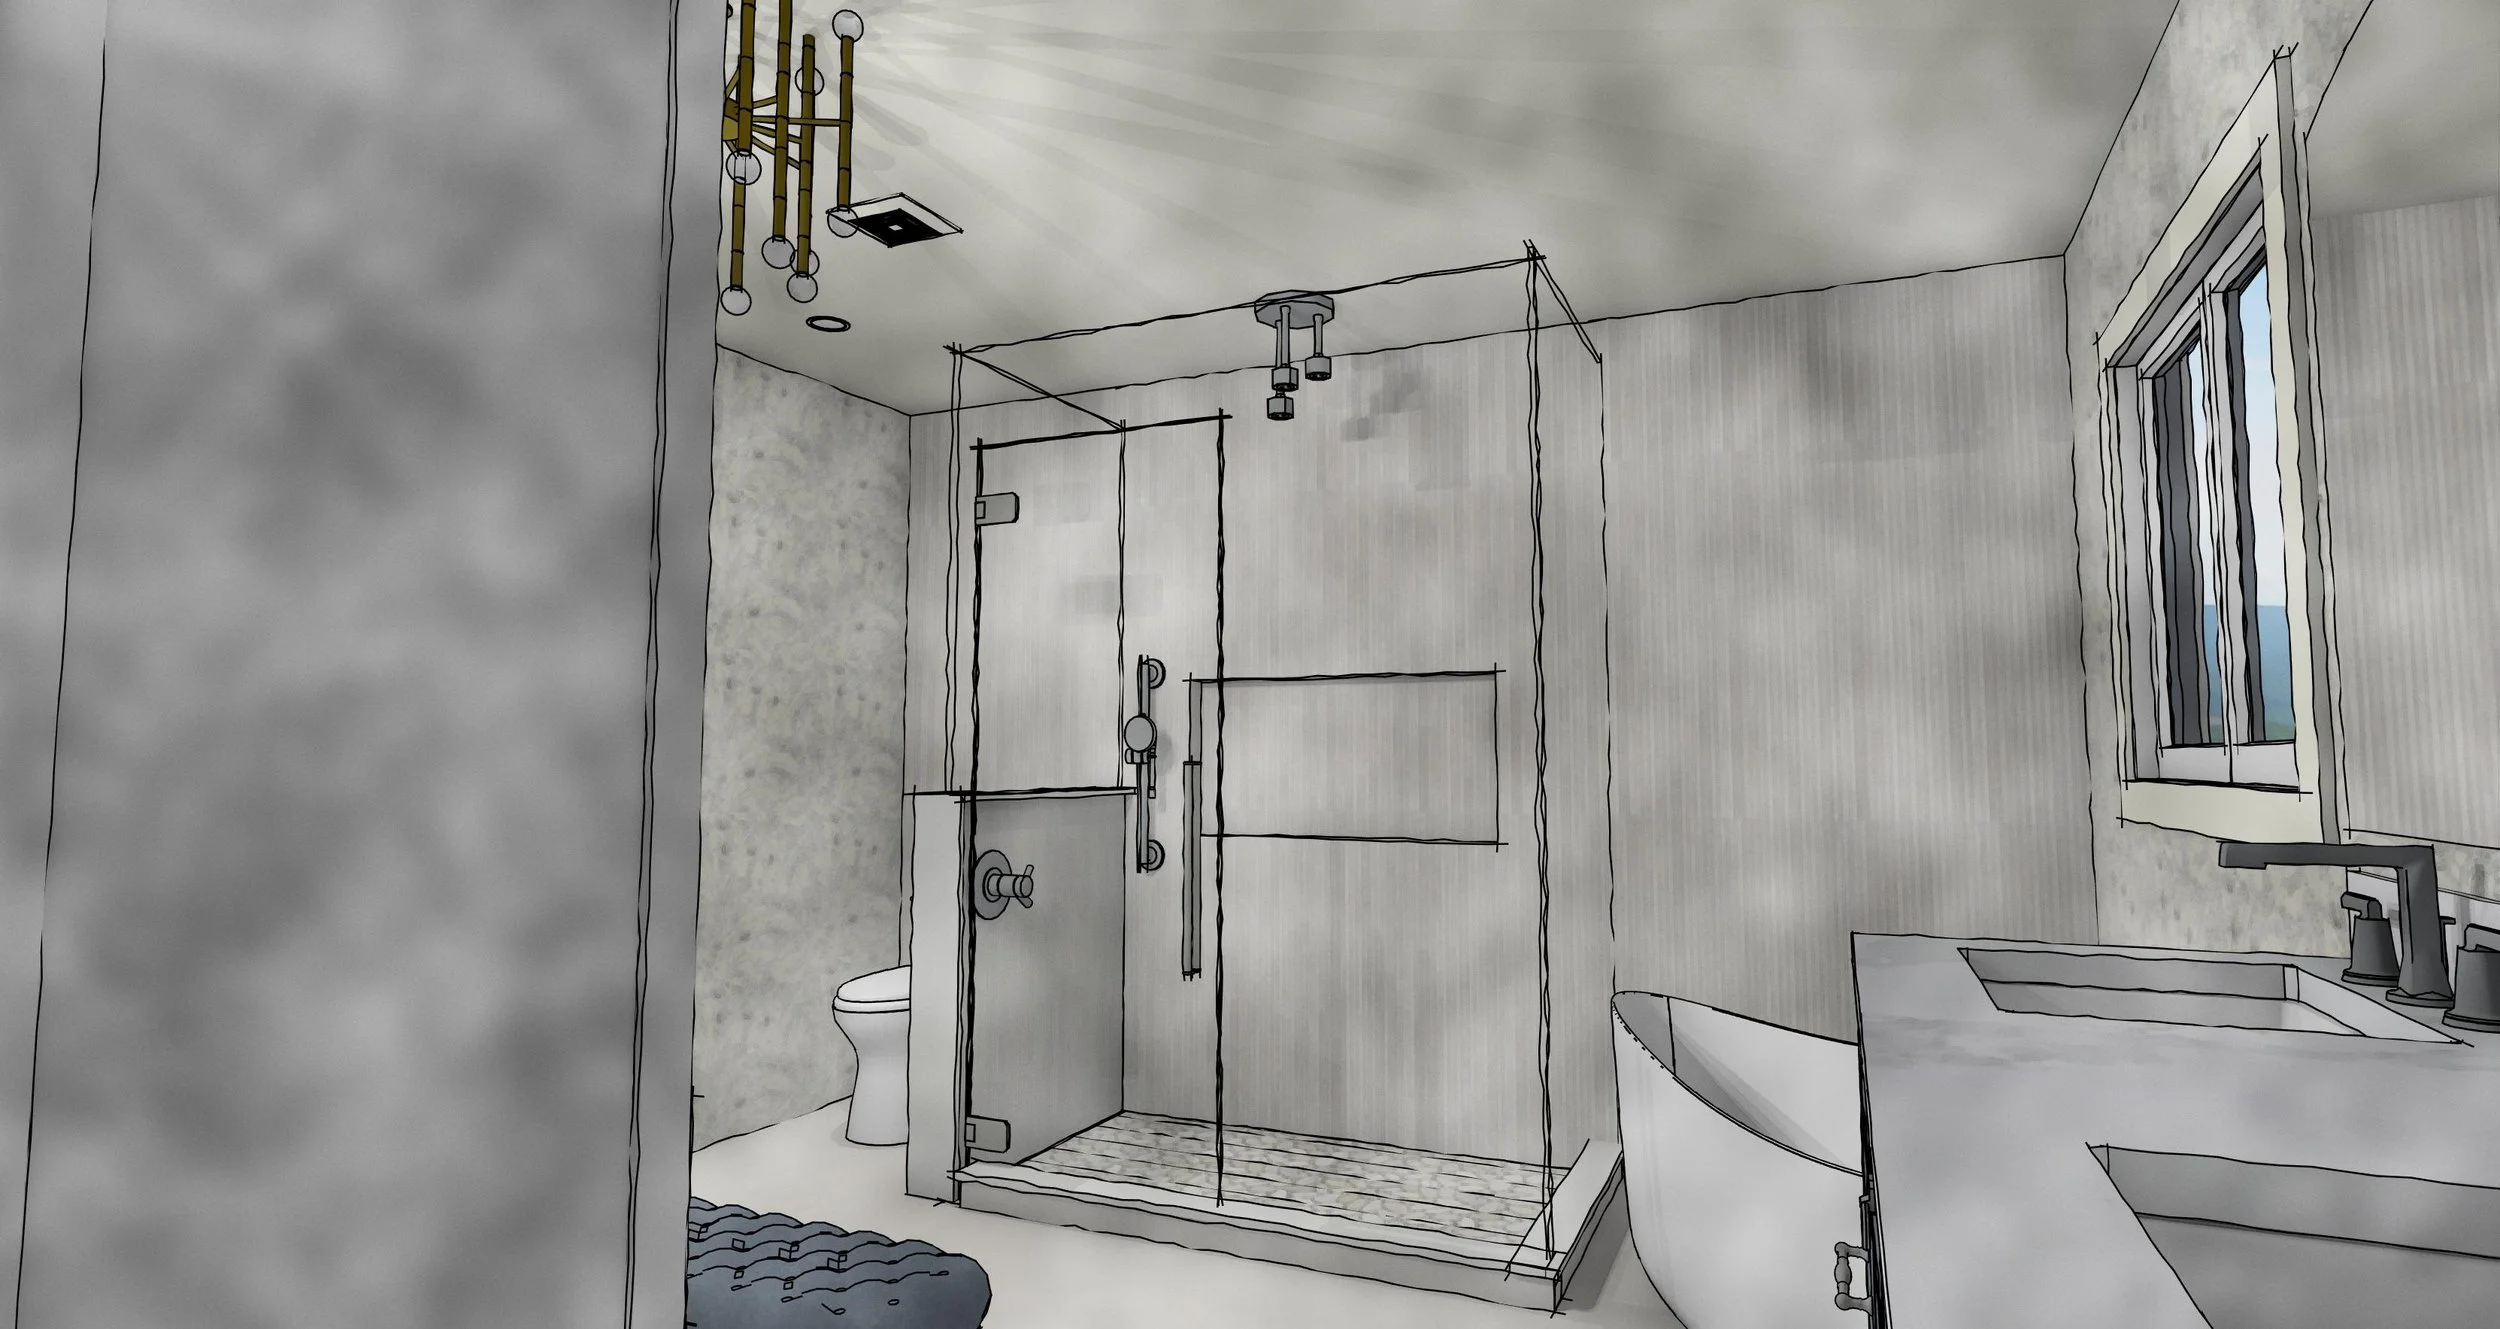
3D rendering for our planned Ensuite | Design by Sheri Bruneau Interiors
As you can see, there is a lot of verbiage that goes into ensuring each trade knows what their job is. I find it is always best to fully put in writing what is expected and have that Scope of Work onsite in the folder that houses many important papers for the project.
I also ensure that I am onsite when each trade begins so that we can go over the design plan, ensure there are no questions and if there are, they are answered so that work does not get delayed.
I hope you join me next week as I share all of the pretty that will be installed.